
Preparing your caravan for winter hibernation
Contact us on0800 975 2931


Hmm… it’s not ideal seeing that tell-tale pimpling on your internal walls - and it’s even less pleasant when you get the bill to fix the underlying problems causing it! Damp is every caravan owner’s nightmare - it's sneaky, stubborn, and potentially expensive if left untreated. But the good news is that with a little know-how and regular maintenance, you can spot the early signs of damp and stop it before it spreads. Here’s everything you need to know to keep your caravan as damp-free as possible and ready for action.
Damp isn’t just a cosmetic issue, because if it’s left unchecked, it will lead to rotting wood, damaged panels, mould growth, delamination and electrical problems. It will undoubtedly lower the value of your caravan when you come to sell it, and living in a damp caravan can also cause health problems, for example asthma in those people that are susceptible. Even a small water leak can quickly escalate into major structural damage, in any caravan, regardless of its age.
Preventing damp occurring isn’t just about comfort, therefore - it’s about protecting your investment and ensuring your caravan remains useable for years to come. It can be a very labour-intensive, expensive problem to deal with, so it’s good to get it right from the start by identifying any issues early if you can.

With damp, the earlier you catch it, the easier it is to fix. Keep an eye out for these signs of both early and progressed damp:
Look for signs of pimples
These will form a cluster of what looks like pimples. This will indicate significant water ingress and the affected wall or ceiling board will need to be replaced.
Discoloured or soft walls and ceilings
Press gently on the internal panels - if they feel spongy or soft, moisture will have crept in and that will be indicating severe damp that will require a professional repair.
Black spots or mould
These are usually found in corners, near windows or around seals and vents. You can also check the furniture and soft furnishings too.
Peeling wallpaper (if you’ve got this) or bubbling laminate
This will be a sign that moisture is trapped beneath the surface, although this is sometimes caused when in countries of high humidity.
Condensation on the windows
While this may not always be damp-related, persistent condensation can indicate that there’s poor ventilation or excess moisture in the air.
If the damp has really progressed and the caravan is verging on rotten, you may notice a musty smell, but only if it’s really bad - so don’t rely on the caravan smelling damp to indicate if you’ve got a problem.

It’s worthwhile investing in a damp meter and every few months checking the caravan for any damp readings (see the chart below). The best places to check are the wallboard under the windows, the sides of any skylight and a few inches from any join, where the wall meets either the floor or ceiling.

If you suspect a problem, use a damp meter to check (these are widely available online - the Surveymaster ones are the ones that dealers use, these are very expensive and come with both invasive and non-invasive pads). Most meters go to 99.9% in terms of readings, but there are a few on the market which only go to 50%. If you are using one of the latter you might think it’s great because the reading is only 30%, yet with the other type that could actually be showing something in the region of 80% damp, for example.
In terms of the damp meter reading that you may get, readings below 15% are generally considered dry and not a cause for concern. Anything above 15-20% in an area could indicate that there’s some damp that needs investigating, with regular checks to see if it gets worse. If there are readings between 20-30% it’s likely that there is water ingress, which will require remedial resealing work to prevent the structure of the caravan deteriorating. Above 31% will show that there is significant moisture that is likely causing damage, which will need extensive repair. Anything above 40-50% will need extensive repair.
With the above, it’s important to find the source of the water ingress, and likely that the wall board will need replacing to prevent it turning into dry rot. Some caravans floors are susceptible to damp, particularly in Baileys, for example.

Most damp issues tend to start small - a cracked seal here, a loose screw there. The key is to knowing where to look, however the source of the ingress may not always be immediately apparent, nor where you expected it to be.
The window and door seals
Over time, the caravan’s rubber seals may perish or come loose, allowing rainwater to seep through. It’s a good idea to inspect them regularly and reseal or replace them if you see any cracks or gaps forming.
Roof lights and vents
These are notorious for leaks, especially if the mastic has deteriorated! Make sure that the vents close tightly and are properly resealed when needed. Be careful when washing your caravan, especially when doing the roof, as you don’t want to be the cause of letting water in…
External joints and trim
Caravan panels expand and contract with every journey undertaken, which can cause the sealant to fail over time. Check all the joints, awning rails and corner trims at least annually.
Damaged panels or windows
Even a small crack can allow water in, especially from rain. Repair any damage promptly before it worsens…
Condensation and poor ventilation
Everyday activities like cooking and sleeping create moisture inside the caravan. Without good airflow, this builds up and creates damp conditions inside, so do open the windows and the door when you can.

Prevention is always better (and cheaper) than cure, of course! Here’s how to keep your caravan as dry as possible all year round.
Ventilate it regularly
Open the windows, roof lights and vents whenever possible - even in winter. Allowing good airflow prevents condensation from settling and reduces the humidity levels inside.
Use a dehumidifier or some moisture traps
When your caravan is being stored, place a few moisture traps inside. For longer-term storage in damp climates, a small electric dehumidifier can make a big difference.
Check the seals and sealant at least once a year
This is your time to inspect every seal and joint, inside and out. Reseal where necessary using caravan-grade sealant, and focus your efforts especially on the roof joints, around the windows, and under trim strips. Rubber seals tend to dry out over time, so use a silicone lubricant or seal conditioner to keep them flexible and watertight.
Keep the exterior clean and protected
Regular washing not only keeps your caravan looking smart but helps you spot any rogue cracks or potential entry points early on. Also, applying a protective wax layer can also help repel any water.
Store it correctly…
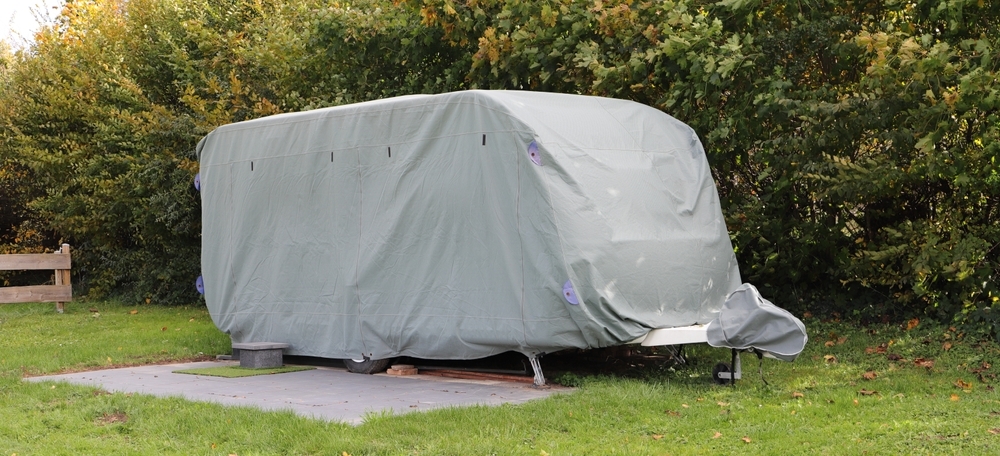
If possible, store your caravan under cover or use a breathable cover that allows moisture to escape whilst also protecting it from the rain. You can read more on this in our article on covering caravans, and whether it’s a good idea or not. Avoid parking under trees, as the falling leaves and debris can block the vents. It’s a good idea to store it on concrete as opposed to grass, which can obviously retain water which can enter the caravan.
Have an annual habitation check
This will help to identify any problems, and also monitor those from the previous year so you can get a clear idea if anything is getting worse.
If damp is localised and minor, you can often handle it yourself. Dry out the area thoroughly using a heater and dehumidifier. Locate and seal the source of the leak - don’t just treat the symptoms. Clean it with mould remover or vinegar to kill the spores and help prevent regrowth, and then replace any damaged materials (like soft panels or insulation) before resealing.
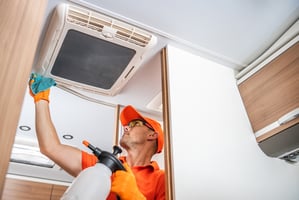
However, if the readings are high or the damage is extensive, it’s wise to get a professional damp repair done. Caravan specialists can strip back the panels, replace any affected wood and insulation, and reseal the structure to stop the problem for good. Make sure that the caravan specialist doesn’t just overboard the existing affected panel; this will initially look like a good repair has been carried out but it’s a bodge repair and will not last. In case of severe damp, the affected panel has to be removed and replaced. If it’s in the floor, you might want to read our article on floor delamination which will certainly help you identify and fix that particular problem area. We do need to be realistic when it comes to older caravans, as it’s likely they will have some level of damp, and bear in mind that just because you have purchased your caravan from a dealer it doesn’t mean that it will remain damp-free for months to come - just to make you aware!
So, there’s some food for thought. A dry caravan is a happy caravan! If you can do regular checks, ensure good ventilation and give a little preventative care, you can hopefully avoid the costly headache of damp and enjoy your time caravanning.
The truth is, damp doesn’t happen overnight - it sneaks in when no one’s looking. So keep an eye out, stay ahead of the game and you’ll be ready to take action if it’s needed.
Preparing your caravan for winter hibernation
How to increase the lifespan of your caravan

Why you should think twice before making changes to your caravan’s interior